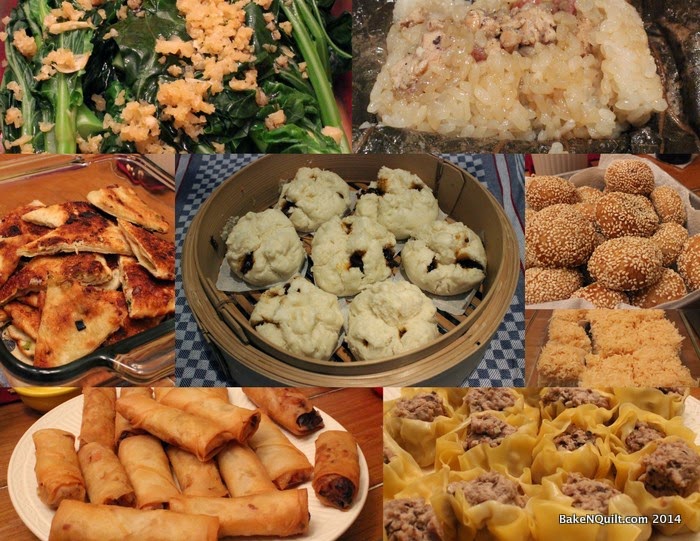
Rebecca made steamed Cha Siu Bao from Fine Cooking and Chinese broccoli with Oyster Sauce and Fried Garlic from seriouseats.com.
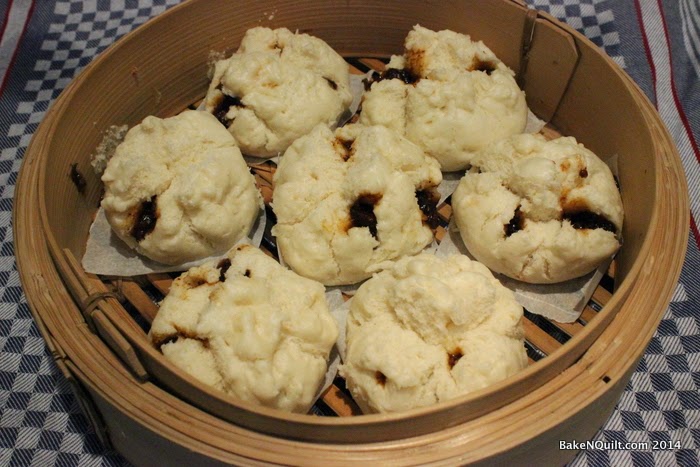
The Cha Siu Bao was a multi-step recipe, starting with the making of Chinese Barbecued Pork Roast. The roast can be made up to 5 days before and chopped and frozen. It was a very involved process, but none of the steps was very hard.
Chinese Barbecued Pork Roast
- 1 (2-lb.) boneless pork loin roast
- 1/2 cup honey
- 1/4 cup oyster sauce
- 1/4 cup hoisin sauce
- 3-1/2 Tbs. double dark soy sauce or double black soy sauce
- 3-1/2 Tbs. light soy sauce
- 3 Tbs. Shaoxing (Chinese rice wine) or dry sherry
- 1-1/4 tsp. five-spice powder
- Kosher salt and freshly ground white pepper
Combine the honey, oyster sauce, hoisin sauce, double dark soy sauce, light soy sauce, Shaoxing, five-spice powder, 1/2 tsp. salt, and a pinch of white pepper in a small bowl and pour over the meat to coat well. Refrigerate for at least 8 hours or overnight.
Position a rack in the top third of the oven and heat the oven to 450°F. Line a small heavy-duty rimmed baking sheet with heavy-duty foil. Put the meat on the baking sheet and spoon some of the marinade over it. Roast until an instant-read thermometer inserted in the middle of the pork registers 165°F, 30 to 40 minutes. During cooking, baste the meat with the juice from the pan and flip it 4 times.
Position an oven rack about 4 inches from the broiler and heat the broiler on high. Broil the pork until it’s slightly charred in places, about 2 minutes.
Cha Siu Bao (Steamed Pork Buns)
For the filling
- 1/2 cup lower-salt chicken broth
- 2 Tbs. oyster sauce
- 2 Tbs. ketchup
- 5 tsp. granulated sugar
- 4 tsp. cornstarch
- 1 Tbs. dark soy sauce
- Kosher salt and freshly ground white pepper
- 1 recipe Chinese Barbecued Roast Pork
- 2 Tbs. peanut oil
- 1 small yellow onion, cut into 1/4-inch dice (1/2 cup)
- 1 Tbs. Shaoxing (Chinese rice wine) or dry sherry
- 1-1/2 tsp. Asian sesame oil
For the dough
- 10-1/8 oz. (2-1/4 cups) bleached all-purpose flour, preferably Gold Medal; more as needed
- 1/2 cup granulated sugar
- 3-1/2 tsp. baking powder
- 6 Tbs. whole milk, at room temperature
- 2 Tbs. melted lard or peanut oil
Make the filling
In a medium bowl, stir or whisk the broth, oyster sauce, ketchup, sugar, cornstarch, soy sauce, 1/2 tsp. salt, and a pinch of pepper. Finely dice enough of the barbecued roast pork to yield 1-1/2 cups (about 6 oz.). Heat a wok over high heat for 30 seconds. Add the peanut oil and swirl to coat. When a wisp of white smoke appears, in about 30 seconds, add the onion. Reduce the heat to medium low and cook, stirring often, until golden-brown, about 6 minutes.Add the pork, increase the heat to high, and stir-fry to combine, 2 to 3 minutes. Drizzle the wine from the edge of the wok into the pork mixture and stir well. Reduce the heat to medium.
Make a well in the center of the mixture and pour in the sauce. Stir until the mixture thickens, about 3 minutes. Add the sesame oil and mix well. Refrigerate until cool.
Make the dough
Mix the flour, sugar, and baking powder on a clean work surface and make a well in the center. While slowly pouring the milk into the well, use your fingers in a circular motion to pull the flour mixture into the milk until it’s absorbed. Make another well, add 3 Tbs. room-temperature water, and continue to use your fingers to work the dough. Add the lard or peanut oil and, using your fingers and a dough scraper or bench knife, work the dough until thoroughly combined.Gather the dough with the dough scraper in one hand and begin kneading with the other. Knead the dough for 10 to 12 minutes—it should feel smooth, pliable, elastic, and slightly tacky to the touch. If the dough is too sticky to work with, sprinkle a little flour on the work surface and your hands as you knead it. If the dough feels dry, lightly wet your hands with water and continue kneading. When the dough is smooth and elastic, shape it into a ball, cover with a slightly damp cloth, and let rest at room temperature for about 1 hour. (The dough must be used within 2 hours of the time it was made. It cannot be frozen.)
Portion the dough
Have ready sixteen 2-1/2-inch squares of parchment or waxed paper.Lightly flour a work surface. Roll the prepared dough into a 16-inch-long log. Cut the log into 16 equal pieces and then roll each piece into a ball. Cover the dough with the damp cloth.
Make the buns
Working with one piece at a time, shape a dough ball into a cup that’s about 1-1/2 inches deep and about 3 inches in diameter. The sides of the dough cup should be thinner than the bottom. Hold the dough cup in one hand and spoon about 1 Tbs. of the pork filling into the center. Gather the edges of the dough and pull them up and over the filling, using your thumb to push the filling down as you pleat with your fingers to cover the filling. It may seem like a tight fit at first, but the dough will stretch as you pull it around the filling. Twist the top to seal the bun and pinch off any excess dough. Put the bun, knot side up, on a parchment square and set aside. As you gain confidence, you may use 1-1/2 Tbs. of filling in subsequent buns. Repeat until 16 buns have been made, cleaning off your thumb on a damp cloth after making each bun.Divide the buns (still on their parchment squares) equally between 2 bamboo steamers, spacing the buns at least 2 inches apart. Stack the steamers on top of each other and cover.
In a wok, bring 6 cups of water to a boil over high heat. Set the stacked steamers over the boiling water and steam the buns until they look fluffy and their tops have opened like flowers to slightly reveal the filling, 15 to 20 minutes. Remove the steamers from the wok, put them on platters and serve the buns immediately, straight from the steamers.
Make Ahead Tips
The filling may be made up to 1 day ahead; keep refrigerated and do not freeze. Cooked buns will keep in an airtight container for 3 to 4 days in the refrigerator or 4 to 6 weeks in the freezer. To reheat: If frozen, let the buns thaw and come to room temperature; if refrigerated, let them come to room temperature. Then steam the buns in bamboo steamers until very hot, 5 to 7 minutes.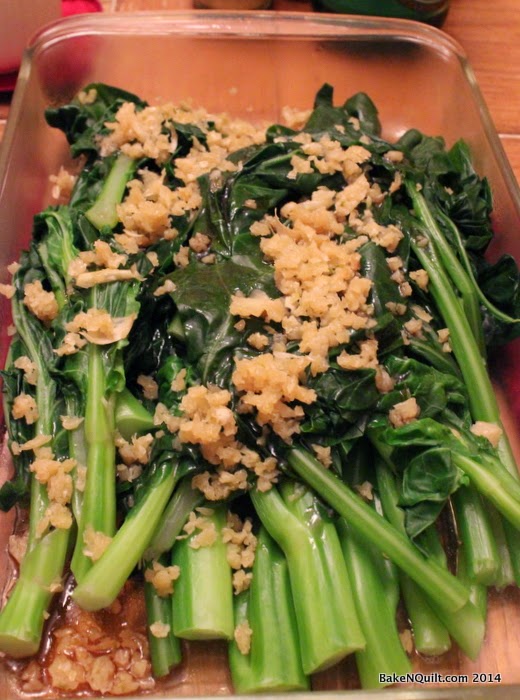
Chinese Broccoli with Oyster Sauce and Fried Garlic
- 1 whole head of garlic, peeled
- Kosher salt
- 1/4 cup vegetable, peanut, or canola oil
- 1 teaspoon sesame oil
- 1 tablespoon oyster sauce
- 10 ounces of Chinese broccoli
Transfer garlic
to the bowl of a food processor or mini food processor. Pulse until
garlic is very finely chopped but not a paste, about 12 short pulses,
scraping down sides as necessary. Add 1/4 teaspoon salt and toss to
combine.
Set a fine mesh strainer over a
heat-proof bowl. Heat 1/4 cup of oil in a small saucepan over medium
heat until shimmering. Add garlic and cook, stirring. Garlic should
maintain a very gently bubble. If bubbling vigorously, reduce heat.
Cook, stirring constantly, until garlic is pale golden brown, 6 to 8
minutes, then immediately strain (do not overcook, garlic will continue
to darken as it rests). Transfer garlic to a paper towel-lined plate to
cool. Reserve fried garlic and oil separately.
In a small bowl combine 1 teaspoon of
reserved garlic oil, sesame oil, and the oyster sauce. Mix well until
combined and then add 1 tablespoon hot water. Stir and set aside.
Reserve remaining garlic oil for another use.
Bring a large pot of water to boil.
Add the Chinese broccoli and until just tender, 4 to 5 minutes. Drain
really well on paper towels or in a salad spinner and place on a serving
platter. Drizzle the mixed oyster sauce on top and sprinkle with the
fried garlic. Serve immediately.
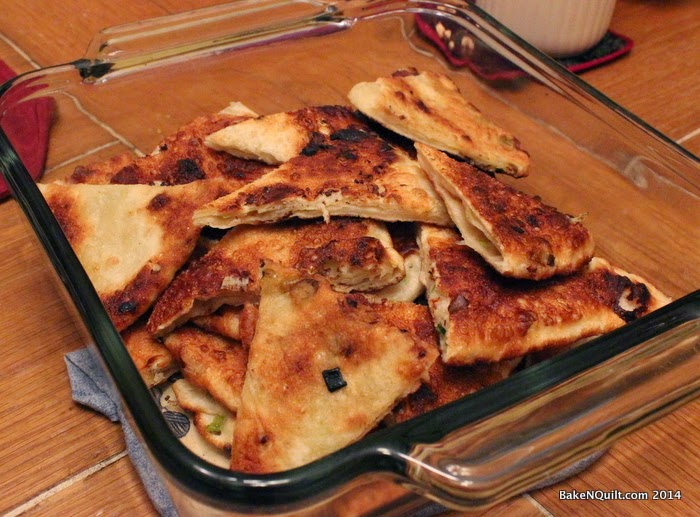
Dani made Soup Dumplings and green onion pancakes.
Dani made Soup Dumplings and green onion pancakes.
Scallion Pancakes
from Thekitchn.com
2 1/2 cups white flour
1 cup warm water
Canola or vegetable oil
Kosher salt
1 bunch scallions
1. Mix 2 1/2 cups flour with 1 cup water until it forms a smooth dough. Knead by doubling the dough over and pressing it down repeatedly, until the dough is even more smooth and very elastic. Coat this ball of dough lightly in oil and put it back in the bowl. Cover the bowl with a damp cloth and let the dough rest for about 30 minutes.
2. Cut the dough into 4 equal parts. Lightly oil the back of a large metal baking sheet. Roll out one part of the dough on the back of the baking sheet. Roll until it is a thin rectangle at least 12 x 9 inches.
3. Finely chop the bunch of scallions and have them ready, along with a small bowl of kosher salt.
4. Lightly brush the top of the dough with oil, then sprinkle it evenly with chopped scallions and kosher salt.
5. Starting from the long end, roll the dough up tightly, creating one long snake of rolled-up dough.
6. Cut the dough snake in two equal parts.
7. Take one of these halves and coil into a round dough bundle.
8. Roll out the coiled dough bundle again into a flat, smooth, round pancake.
9. Heat a 10-inch heavy skillet or sauté pan over medium-high heat, and oil it with a drizzle of canola of vegetable oil. When the oil shimmers, pick up the pancake dough and lay it gently in the pan. It should sizzle, but not burn. Cook for 2 minutes on one side.
10. Flip the pancake over with a spatula and cook for an additional 2 minutes on the other side, or until golden brown.
11. Cut the pancake into wedges with a pair of kitchen scissors, and serve immediately with soy sauce or another dipping sauce.
Additional Notes:
If you would like to make a few pancakes but save the rest for later, you can save the dough in the fridge for up to 5 days. Just make sure the dough is oiled and well-covered. You can also roll out individual pancakes and stack them between well-oiled layers of wax paper.
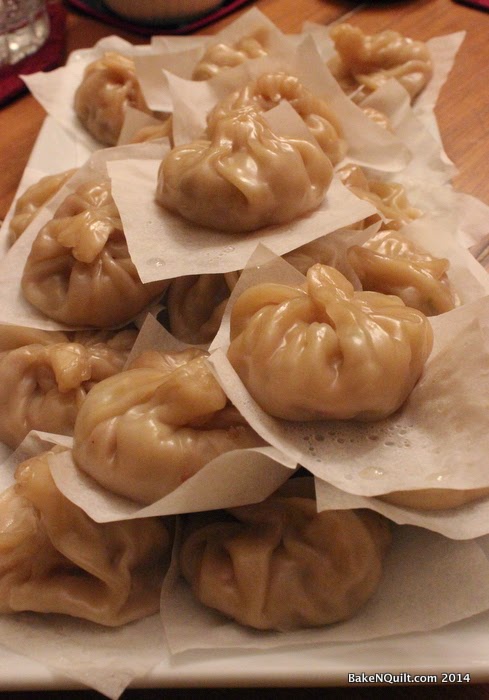
Shanghai Soup Dumplings (Xiao Long Bao)
from Spoonforkbacon.com
Makes approx 40 dumplings
aspic:
2 cups homemade (or all natural, store bought) chicken stock
1/2 teaspoon salt
2 teaspoons unflavored powdered gelatin OR 3 gelatin sheets
filling:
1 lb. ground pork
1 cup cooked and chopped vermicelli rice noodles
3 garlic cloves, minced
1 tablespoon minced ginger
1 1/2 teaspoons minced lemongrass
2 green onions, thinly sliced
2/3 cup diced water chestnuts (optional)
1 1/2 teaspoons low sodium soy sauce
1 teaspoon sesame oil
1 teaspoon sea salt
1/2 teaspoon ground white pepper
1 large egg, lightly beaten
40 round wonton wrappers
savoy or napa cabbage
1. For stock: Pour stock into a small pot and bring to a boil. Stir in salt and continue to boil until the stock has reduced by half. Remove from heat. Sprinkle gelatin into a bowl of 1/2 cup water and allow gelatin to bloom (you will know the gelatin is ready, when it expands and absorbs all the water). 2. Pour the gelatin mixture into the hot stock, stir until dissolved and pour into a shallow, 8”x11” baking dish. Cover and refrigerate for at least 6 hours, but preferably overnight until an aspic forms (the stock gelatinizes). Once aspic is ready, cut into 1/2 inch squares and continue to refrigerate until ready to use. 3. For filling; In a large mixing bowl, combine all the ingredients and gently mix together until fully combined, making sure not to overwork the meat mixture. Cover and refrigerate for at least an hour or until ready to use. 4. To assemble: Brush some egg wash over the surface of a wonton wrapper and fill with 2 teaspoons of filling. Top filling with 1 or 2 small cubes of aspic and carefully gather the perimeter of the wonton and pull it until the center, to create a pouch. Gently twist the gathered wonton to seal the pouch and pinch off the end. 5.Line a bamboo steamer (or whatever steaming device you have) and line it with a single layer of savoy or napa cabbage. Place steamer over a pot filled up halfway with water (like a double boiler) and boil over medium-high heat. Steam dumplings for about 10 to 12 minutes or until the filling has cooked through and the stock has melted into a liquid. 6. Allow dumplings to cool for 1 to 2 minutes before serving in the steamer.
Lauren made chicken and rice wrapped in lotus leaves (Lo Mai Gai) and Pork Dumplings Siu Mai (or Shao, Mai, Shumei, Shu Mei, Suimai,). I (Lauren) got some recipe help from my Chinese coworkers. Both recipes were made from a mix of advice, translated recipes, and some English Language recipes I found.
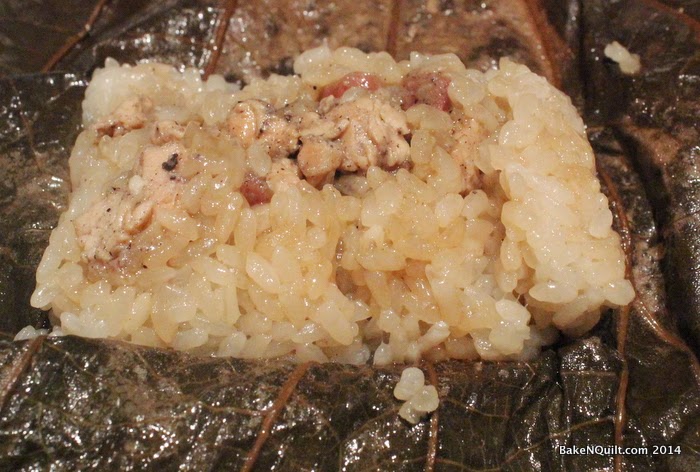
Lo Mai Gai
Sticky Rice with Chicken in Lotus Leaf
For reference, see http://home.meishichina.com/recipe-28606.html (ran it through Google Translate and then coworkers),http://focussnapeat.com/2013/02/06/how-to-make-sticky-rice-chicken-lo-mai-gai-in-lotus-leaves/, and http://thewoksoflife.com/2014/04/dim-sum-sticky-rice-lotus-leaf-wraps-w-chicken-lo-mai-gai-luo-mi-ji/
Makes 4 to 5 servings
Ingredients
2 dried lotus leaves*
2 cups glutinous rice (aka sweet rice)
Seasoning for rice
1/2 t chicken bouillon (powder form) (I skipped this as I did not have any. I added some checken stock instead)
1 T light soy sauce
1 T sesame oil
1/4 cup warm wate
Filling
1 skinless chicken breast, chopped into tiny cubes
1/2 lap cheong (Chinese sausage), diced
2-3 dried shiitake mushrooms, rehydrated and chopped
1 t fresh ginger, minced or grated
1 t ground white pepper
1 T soy sauce
1 T sesame oil
1 T Xiao Xin wine (Chinese rice cooking wine)
1 T oyster sauce
1 t cornstarch
Instructions
Soak glutinous rice in water for 2 hours (or overnight).
Prep lotus leaves by cutting one in half down the middle. Cut away the tough part near the base of the stem and any outer-edges that are broken or damaged. Then bring water in a wok or large pot to a boil and boil the leaves for about 3 to 5 minutes until soften and easy to work with. Drain leaves in colander in sink until ready to use. (You might want to prepare a couple of extra leaves, just in case.)
Prep the dried shiitake mushrooms by boiling in water with a dash of soy sauce for about 10 to 15 minutes, or under they look soft. Remove from heat and pour out the hot water, then soak for a minute in cold water. Drain water and squeeze mushrooms to get out excess water.
In a bowl, whisk together the ingredients for the rice seasoning (chicken stock or bouillon, light soy sauce, sesame oil, water). If you use stock, skip the water, substitute the stock for the water. Then add rice and blend. Set aside to let cool.
Marinate the chicken with ground white pepper, soy sauce, sesame oil, Xiao Xin wine, oyster sauce, cornstarch and ginger. Let sit for about 10 minutes.
In a small skillet or sauté pan, add a bit of oil (any neutral flavored oil will do) and warm over medium high heat. Add chicken and brown lightly on all sides (do not add all the marinade because you don’t want the chicken to be sitting in soup). Then add lap cheong and mushrooms. Mix together for about a minute. If you still have marinade left, add to pan and quickly cook until thicken. Set aside.
Assemble your lo mai gai packets by laying down the lotus leaf with the bumpy stem side up. Place layer of rice near bottom third of the leaf, about a 4”x4” square. Place a tablespoon of filling in the center and then add some rice on top. Fold the lotus leaf like a burrito, wrapping over the rice once and then pulling in the sides and rolling. Do the same with the remaining leaves and ingredients.
Some of the lotus leaves had holes, so I wrapped the outside of the leaf with some parchment paper.
Place your packets in the steamer (with the loose end leave part on the bottom) and cook over medium heat for 30 to 40 minutes. Let cool for about a minute before serving.
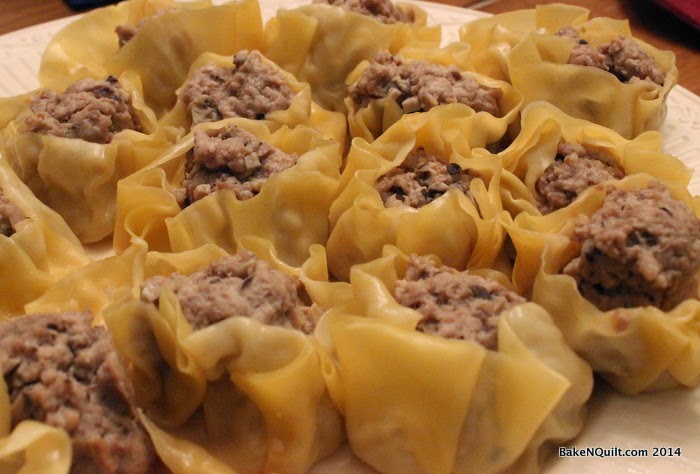
Pork Dumplings (Siu Mei)
Sometimes you will see recipes with shrimp or mushrooms. In addition to this recipe, I also consulted http://www.chinesechicken.net/siu-mei/
Ingredients
1 pound ground pork
1 cup finely chopped water chestnuts
1 tablespoon soy sauce
1 tablespoon rice wine vinegar
1 tablespoon sesame oil
2 teaspoons sugar
2 teaspoons freshly grated ginger
2 tablespoons cornstarch
1 teaspoon coarse salt
/ teaspoon finely ground black pepper
30 shao mai or dumpling wrappers
Yield: 30 dumplings.
Instructions
1. Combine the pork, water chestnuts, soy sauce, vinegar, oil, sugar, ginger,
cornstarch, salt and pepper in a bowl and mix well to combine (hands work well for this).
2. Place a dumpling wrapper in the palm of one hand and cup it loosely. Place a generous tablespoon of filling in the center of the wrapper. With your free hand, gather the sides of the wrapper around the
filling, letting the wrapper pleat naturally. Squeeze the middle gently and tap the dumpling to
flatten the bottom so that it can stand upright. The meat filling will show a little at the top. Make the remaining dumplings in the same manner.
3. Arrange filled dumplings about 1/4 inch apart in two steamer trays that have been lined with wet cheesecloth. When ready to steam, fill a wok or lower part of a steamer with water so that it comes within an inch of the steamer tray, and bring to a rolling boil. Stack the steamer trays in the wok or steamer, cover tightly, and steam dumplings for 20-25 minutes over high heat, reversing the trays after 10 minutes. Use a slotted spoon to transfer dumplings to a platter.
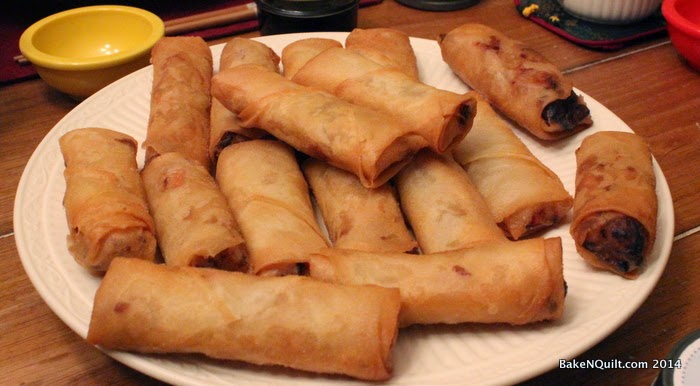
Katharina made Spring Rolls.
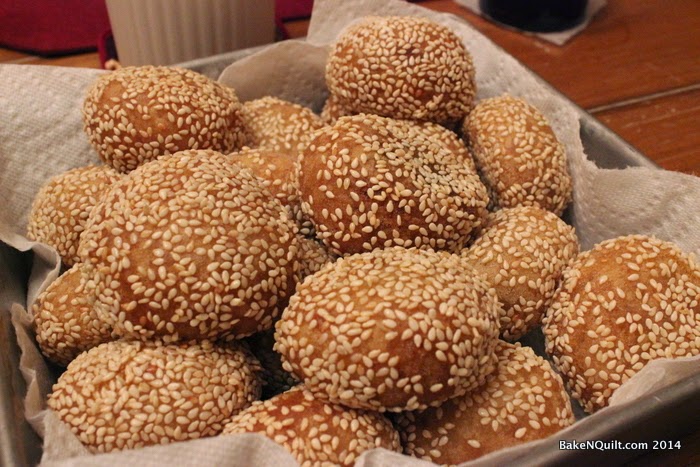
Kim made dessert - Sesame balls with fig filling and coconut rice bars.
This is the recipe I used as a base, but see below recipe for my notes
Sesame Balls with Drunken Fig Filling
from The Sweet Spot: Asian-Inspired Desserts (via epicurious.com)
by Pichet Ong and Genevieve Ko
Makes 25 balls
Sesame balls are classic dim sum. In the yum chat (dim-sum dining) culture, these sticky-sweet treats are eaten between savory bites throughout the meal. Traditionally, the dough is made only with glutinous rice flour, which is quite sticky and will leave you searching for a toothpick. I add taro to make the dough more tender, more tasty, and a lovely shade of lavender. I substitute flavorful figs for the traditional lotus seed and red bean fillings.
CHEF'S TIPS: In Chinese cooking, sesame seeds are never deeply browned— their white color symbolizes purity. Be sure to start with untoasted white sesame seeds for a light golden color when the balls are done.
Most fried desserts are best eaten right away, but these stay delicious and crisp even at room temperature.
Ingredients:
Drunken Fig Filling:
2 1/4 cups (15 3/4 ounces/448grams) dried figs, preferably Black Mission, stemmed and quartered
1/2 cup (3 1/2 ounces/98 grams) sugar
1 teaspoon salt
1/4 cup (2 ounces/56 grams) cognac or dark rum
Sesame Ball dough:
1 cup (7 ounces/200 grams) sugar
1 tablespoon salt
1 1/2 teaspoons baking soda
5 1/3 ounces (150 grams) taro, deeply peeled and cut crosswise into 1/2-inch slices
3 1/2 cups (16 1/8 ounces/462 grams) glutinous rice flour
Canola, vegetable, or other neutral oil for deep-frying
1 cup (3 3/8 ounces/96 grams) white sesame seeds
Preparation:
1. To make the drunken fig filling: Put all the ingredients into a large mixing bowl and stir well to coat the figs with the sugar. Cover and set aside at room temperature for at least 30 minutes, or as long as overnight.
2. Transfer the figs and liquid to the bowl of a food processor or an electric mixer fitted with the paddle attachment. Process or beat the mixture until mashed to a paste. (You can also mash the mixture by hand with a fork.) Cover and refrigerate until ready to use; the filling can be kept for up to 2 weeks.
3. To make the sesame balls: Put the sugar, salt, and baking soda into the bowl of an electric mixer fitted with the paddle attachment and mix well; set aside.
4. Fill a large saucepan fitted with a steamer basket or rack with water to a dept of 2 inches and bring to a rolling boil. Put the taro in the basket and steam until very soft, about 10 minutes; it should fall apart if poked with a knife. Immediately add the taro to the sugar mixture, and beat on medium speed until smooth and pasty, about 5 minutes.
5. Meanwhile, bring 1 cup plus 2 tablespoons water to boil.
6. Turn the mixer speed to low and add the glutinous rice flour. When the mixture is crumbly, add the boiling water all at once. (The water must be boiling when added.) Continue beating until the dough is soft and only slightly sticky. Squeeze the dough into a ball, wrap in plastic wrap, and set aside until it cools to room temperature.
7. Shape the dough into a log 1 inch in diameter, and cut the log into 2-inch lengths. One at a time, flatten each piece of dough with your palm into a circle 4 inches in diameter and 1/4 inch thick. Put 1 tablespoon of the chilled fig filling into the center of the circle, then bring the edges together to form a half-moon and pinch to seal. Pinch off the excess dough at the two ends and roll the filled dumpling into a ball. Set aside.
8. Fill a deep, heavy saucepan with oil to depth of at least 3 inches and heat to 300°F. Fill a shallow dish with 1/8 inch of water and another shallow dish with the sesame seeds. Roll a sesame ball in the water, just enough to moisten, then roll in the sesame seeds until well coated. Press the seeds so they stick to the balls, if necessary. Carefully lower the coated ball into the oil and cook, without stirring, until it floats and is crisp and light golden brown, about 5 minutes. You can cook about 8 balls at a time, but do not overcrowd the pan. Carefully remove from the oil and drain on paper towels. Repeat with the remaining balls. Serve hot or at room temperature.
Kim's notes:
I blew it and bought taro stems instead of root. I did not have time to go to the store, so I steamed and mashed the equivalent amount of peeled baking potato instead. The dough was sticky (I would say that my change might have been the reason, but based on the epicurious.com reviews, that does not seem to be the case).
With the dough so sticky, I found it was easiest to smoosh the dough into something resembling a flattish circle with my fingertips (just barely large enough to encase a tablespoon of filling), then tuck a tablespoon of filling into the middle while simultaneously pulling the dough around the filling. I used rice flour liberally on the board and my hands to help with the stickiness of the dough and rolled the slightly crescent shaped balls into rounds.
When it came time to fry, I found temperature is very important. Use a thermometer and keep the oil at or near 300° If it is too hot, the dough will not cook enough on the inside, meanwhile the outside of the balls will start to get overly browned. What I did to keep the process going: roll 3-4 balls of dough with filling, coat them with water, sprinkle/roll them in sesame seeds, put them in the heated oil, start getting the next batch of 3-4 balls ready while there were 3-4 frying. Set a timer to alert me to check the frying balls & turn them before they were overly browned. Once they were taken out of the oil, allow the oil to come back up to 300° before putting the next ones in.
This made a LOT for our small group (and I think I threw away the 1st four because they were raw inside and overly browned on the outside). I would probably make a smaller batch in the future because it is not the kind of thing that gets better after a few days of sitting on the counter.
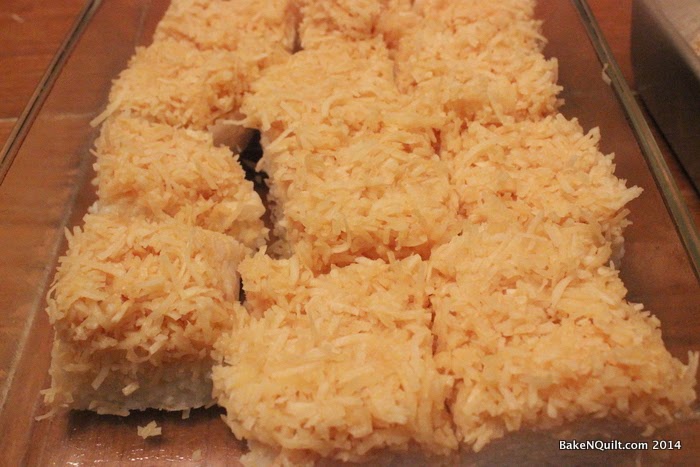
Sweet Coconut Bars
from ?
Makes 16 pieces
545g (17.5oz/2 1/2 cups) glutinous rice
560ml (18 fl oz/2 1/4 cups) coconut milk
110g (3 1/4oz/1/2 cup) superfine (caster) sugar
Topping:
150g (5oz/1 1/4cups) unsweetened shredded (desicated) coconut
60ml (2 fl oz/1/4 cup) coconut milk, warmed
90g (3oz) grated palm sugar or brown sugar
3 tablespoons water
Place rice in a large bowl, cover with cold water and let stand
overnight.
Line a large bamboo steamer with parchment (baking paper) and spread
drained rice on top. Cover steamer.
Half fill a medium wok with water (steamer should not touch water)
and bring to a boil. Place steamer over boiling water and steam
until rice is tender, about 45 minutes, adding more boiling water to
wok when necessary.
Place steamed rice into a medium, heavy bottomed saucepan. Add
coconut milk and sugar. Stir over low heat until the coconut milk
has been abosorbed, about 10 minutes. Line a shallow baking pan
(about 7 1/2 x 11-inches) with parchment paper, spray with cooking
spray. Evenly spread rice into pan. Refrigerate until firm, about 2
hours.
To make topping, combine coconut and coconut milk. Place palm sugar
and water in a small saucepan and stir over low heat until mixture
thickens slightly, 3-4 minutes. Pour into coconut and milk mixture
and stir until well combined. Allow to cool to room temperature.
Spread topping over rice and refrigerate for 1 hour. Cut into small
squares and serve.
Kim's notes: It didn't seem like it would be that much - an 11 x 7 1/2" pan - but for our small group, with another dessert, it was a lot. I would halve the recipe and make it in an 8x8 or 9x9 pan in the future, unless I am feeding a large crowd.


